この記事は、Azure Advent Calendar 2015 の 4 日目 の記事です。
qiita.com
Azure Resource Manager(ARM)REST API を呼び出せる SDK のプレビュー版が公開されているので、試してみました。Azure Web Apps に ASP.NET MVC アプリケーションをデプロイします。
Azure Active Directory 認証する
ARM SDK を使うためには、OAuth2 を使ってベアラー トークンを取得するために、Azure Active Directory(AAD)で認証する必要があります。ネイティブアプリケーションからの認証に便利な Active Directory Authentication Library(ADAL)を利用します。
http://www.bradygaster.com/post/using-windows-azure-active-directory-to-authenticate-the-management-libraries
こちらのブログを参考にポータルで AAD の設定を行い、WPF アプリケーションに ADAL を NuGet からインストールします。
- Install-package Microsoft.IdentityModel.Clients.ActiveDirectory
テナント ID、クライアント ID、リダイレクト URIは、環境に合わせて書き換えてください。
private void Window_Initialized(object sender, EventArgs e)
{
    this._accessToken = this.GetAccessToken();
}

private string GetAccessToken()
{
    var tenantId = "xxx";
    var clientId = "xxx";
    var redirectUri = "http://localhost/ARMApp";


    AuthenticationResult result = null;
    var context = new AuthenticationContext("https://login.windows.net/" + tenantId);
    var thread = new Thread(() =>
    {
        result = context.AcquireToken("https://management.core.windows.net/", clientId, new Uri(redirectUri));
    });
    thread.SetApartmentState(ApartmentState.STA);
    thread.Name = "AquireTokenThread";
    thread.Start();
    thread.Join();

    if (result == null)
    {
        throw new InvalidOperationException("Failed to obtain the JWT token");
    }
    return result.AccessToken;
}
Azure Resource Manager のテンプレートを作成する
Visual Studio を使って、ARM のテンプレートを作成します。テンプレートの作成には、Azure クイック スタート テンプレートが参考になります。今回は、次の3つのリソースを追加します。
- App Service プラン(サーバーファーム)
- Web App
- Web App の Web 配置
App Service プランや Web App の名前をリソースグループ ID で動的に決定し、WebDeploy パッケージの URI だけをパラメータで指定できるようにしました。作成したテンプレートと WebDeploy パッケージは、Azure Blob Storage にアップロードしておきます。
azuredeploy.json
{
    "$schema": "https://schema.management.azure.com/schemas/2015-01-01/deploymentTemplate.json#",
    "contentVersion": "1.0.0.0",
    "parameters": {
        "packageUri": {
            "type": "string",
            "minLength": 1,
            "metadata": {
                "description": "Uri of the webdeploy package"
            }
        }
    },
    "variables": {
        "hostingPlanName": "[concat('hostingPlan', uniqueString(resourceGroup().id))]",
	"webAppName": "[concat('webApp', uniqueString(resourceGroup().id))]"
    },
    "resources": [
        {
            "name": "[variables('hostingPlanName')]",
            "type": "Microsoft.Web/serverfarms",
            "location": "[resourceGroup().location]",
            "apiVersion": "2014-06-01",
            "dependsOn": [ ],
            "tags": {
                "displayName": "hostingPlan"
            },
            "properties": {
                "name": "[variables('hostingPlanName')]",
                "sku": "Free",
                "workerSize": "Small",
                "numberOfWorkers": 1
            }
        },
        {
            "name": "[variables('webAppName')]",
            "type": "Microsoft.Web/sites",
            "location": "[resourceGroup().location]",
            "apiVersion": "2014-06-01",
            "dependsOn": [
                "[concat('Microsoft.Web/serverfarms/', variables('hostingPlanName'))]"
            ],
            "tags": {
                "[concat('hidden-related:', resourceGroup().id, '/providers/Microsoft.Web/serverfarms/', variables('hostingPlanName'))]": "Resource",
                "displayName": "webApp"
            },
            "properties": {
                "name": "[variables('webAppName')]",
                "serverFarm": "[variables('hostingPlanName')]"
            },
            "resources": [
                {
                    "name": "MSDeploy",
                    "type": "extensions",
                    "location": "[resourceGroup().location]",
                    "apiVersion": "2014-06-01",
                    "dependsOn": [
                        "[concat('Microsoft.Web/sites/', variables('webAppName'))]"
                    ],
                    "tags": {
                        "displayName": "webDeploy"
                    },
                    "properties": {
                        "packageUri": "[parameters('packageUri')]",
                        "dbType": "None",
                        "connectionString": "",
                        "setParameters": {
				"IIS Web Application Name": "[variables('webAppName')]"
                        }
                    }
                }
            ]
        }
    ],
    "outputs": {
    }
}
azuredeploy.param.dev.json
{
    "$schema": "https://schema.management.azure.com/schemas/2015-01-01/deploymentParameters.json#",
    "contentVersion": "1.0.0.0",
    "parameters": {
        "packageUri": {
            "value": "https://xxx.blob.core.windows.net/arm/WebApplication1.zip"
        }
    }
}
Azure Resource Manager SDK を使う
WPF アプリケーションに ARM SDK のライブラリを NuGet からインストールします。
- Install-Package Microsoft.Azure.Management.Resources -Pre
ARM SDK で各リソースを作成する ARMHelper クラスを実装します。
internal class ARMHelper
{
    private readonly string _subscriptionId = "xxx";
    private readonly TokenCredentials _credentials;

    public ARMHelper(string accessToken)
    {
        this._credentials = new TokenCredentials(accessToken);
    }

    public async Task CreateResourceGroupsAsync(string resourceGroupName, string location)
    {
        using (var client = new ResourceManagementClient(this._credentials))
        {
            client.SubscriptionId = this._subscriptionId;
            var parameters = new ResourceGroup { Location = location };
            await client.ResourceGroups.CreateOrUpdateAsync(resourceGroupName, parameters);
        }
    }

    public async Task DeployAsync(string resourceGroupName)
    {
        var paramFileLink = "https://xxx.blob.core.windows.net/arm/azuredeploy.param.dev.json";
        var templateFileLink = "https://xxx.blob.core.windows.net/arm/azuredeploy.json";

        using (var client = new ResourceManagementClient(this._credentials))
        {
            client.SubscriptionId = this._subscriptionId;
            var parameters = new Deployment( new DeploymentProperties { Mode = DeploymentMode.Incremental, ParametersLink = new ParametersLink(paramFileLink), TemplateLink = new TemplateLink(templateFileLink) });
            await client.Deployments.CreateOrUpdateAsync(resourceGroupName, "ARMDeploy", parameters);
        }
    }
}
paramFileLink と templateFileLink には、先ほどアップロードしたテンプレートの URI を指定してください。
WPF アプリケーションから呼び出す
WPF アプリケーションのボタンクリックイベントで、デプロイの処理を実装します。
- WebDeploy Package(zip)を Azure Blob Storage にアップロード
- リソースグループを作成
- ARM テンプレートを使ってデプロイ
private async void Button_Click(object sender, RoutedEventArgs e)
{
    var location = "japanwest";
    var resourceGroupName = this.ViewModel.ResourceGroupName;
    var sourcePath = this.ViewModel.SourcePath;
    var helper = new ARMHelper(this._accessToken);

    await Task.Run(async () =>
    {
        // WebDeploy Package をアップロード
        await this.UploadWebDeployPackageAsync(sourcePath);

        // リソースグループを作成
        await helper.CreateResourceGroupsAsync(resourceGroupName, location);

        // デプロイ
        await helper.DeployAsync(resourceGroupName);
    });

    MessageBox.Show("デプロイが完了しました。", this.Title);
}

private async void Button_Click_1(object sender, RoutedEventArgs e)
{
    var resourceGroupName = this.ViewModel.ResourceGroupName;
    var helper = new ARMHelper(this._accessToken);

    await Task.Run(async () =>
    {
        // リソースグループを削除
        await helper.DeleteResourceGroupsAsync(resourceGroupName);
    });

    MessageBox.Show("リソースグループを削除しました。", this.Title);
}

private async Task UploadWebDeployPackageAsync(string sourcePath)
{
    var account = CloudStorageAccount.Parse(ConfigurationManager.AppSettings["MyStorage"]);
    var client = account.CreateCloudBlobClient();
    var container = client.GetContainerReference("arm");
    var blob = container.GetBlockBlobReference("WebApplication1.zip");
    using (var fileStream = File.OpenRead(sourcePath))
    {
        await blob.UploadFromStreamAsync(fileStream);
    }
}
結果確認
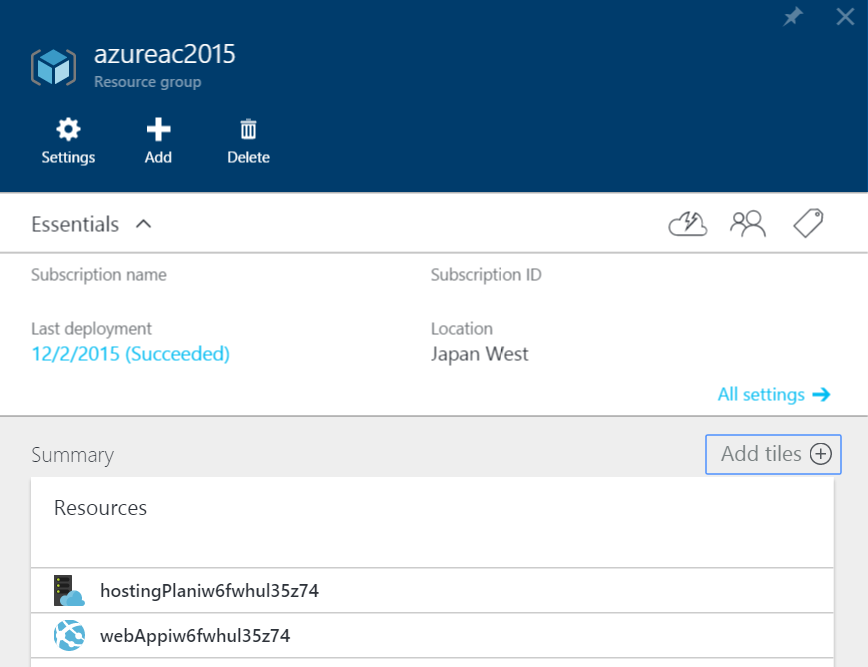
リソースグループ名を入力し、Deploy ボタンを押します。

リソースグループ内に各リソースが作成されていることが分かります。
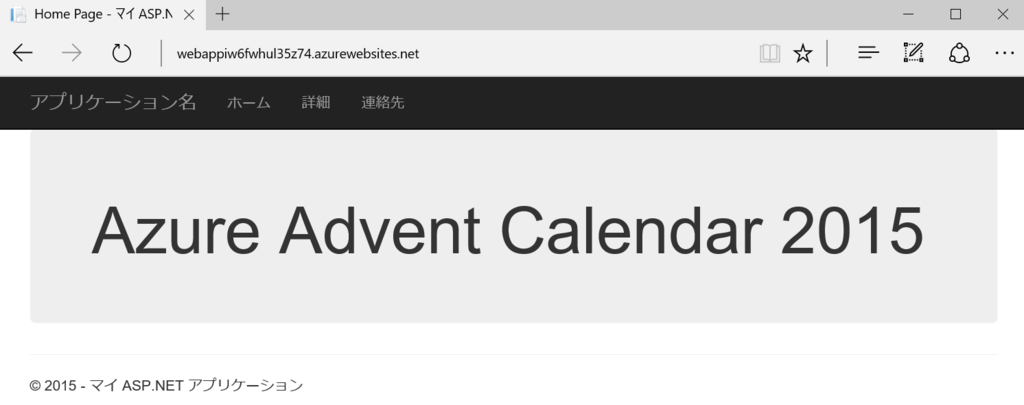
そして、ASP.NET MVC アプリケーションも無事にデプロイされています!
Delete ボタンを押すと、リソースグループ内の各リソースをまとめて削除できます。
まとめ
ARM の良いところは、開発する人でも運用する人でもミスなくお手軽にデプロイできることです。JSON テンプレートを使えば、手続き型ではなく宣言型の管理ができるので、簡単にクラウド環境を作ったり消したりすることができます。これからは、従来までのデプロイ管理の視点を変えて、ARM ベースに移行していきたいと思います。